
Categories
Motovation Blog
- Jan 30, 2025 SC-Project Exhausts Announced as Title Sponsor for the 2025 MotoAmerica Twins Cup Racing Series The MotoAmerica Twins Cup series, known for its thrilling races and competitive spirit, showcases some of the finest up-and-coming talents and machines in the industry.
- Jan 9, 2025 Motovation Announced as Title Sponsor for 2025 MotoAmerica Supersport Class Motovation is thrilled to announce its title sponsorship of the 2025 MotoAmerica Supersport class.
Motovation FSH11B Frame Slider Installation Instructions
***PLEASE NOTE: Motovation must insist that all protection parts and accessories are professionally installed to ensure proper fitment and maximum protection. These instructions are for reference only, and do not reference a specific bike model. Your installation procedure may vary.***
Honda 919 Hornet Frame Slider Installation Instructions
Congratulations! You have just purchased the world’s finest frame sliders for the Honda CBR919 900 Hornet. These sliders have been designed to offer unsurpassed protection for your Honda CBR919 900 Hornet in the unfortunate event of a lowside or tip over. Motovation frame sliders are designed and manufactured by a company that only makes frame sliders. Each and every model is tested for drop and slide protection. They are tough but not brittle and can also absorb a huge impact. Sportsriders around the world who have tested various models of our products on the track have all given their thumbs up after experiencing first hand, the benefits of Motovation Frame Sliders.
Please read all instructions before beginning work! These frame sliders are designed to fit specific engine mounts of your Honda CBR919 900 Hornet. This kit has separate left and right pieces (left and right while sitting on the bike). It is highly recommended that you refer to your service manual before performing this installation. Factory torque specs are recommended.
This is an improved version of the 900 slider and replaces the previous design. Please note that you will have to ream the frame hole to accept the 10mm rod supplied with this kit.
Included in this kit:
1 x left side frame slider -longer
1 x right side frame slider -shorter
2 x locknuts
2 x stainless steel washers
1 x 460mm stainless steel threaded rod
Tools Required:
Torque Wrench
12mm socket
Flat head screw driver (for removing plastic blank covering bolt location)
INSTRUCTIONS:
Remove the plastic caps covering the correct bolts with a screw driver.
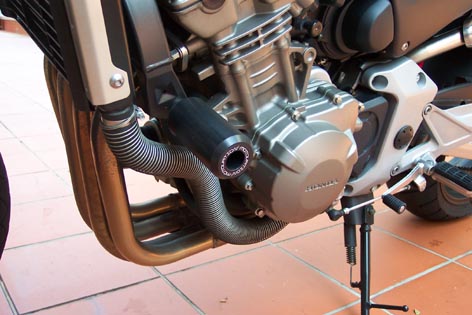
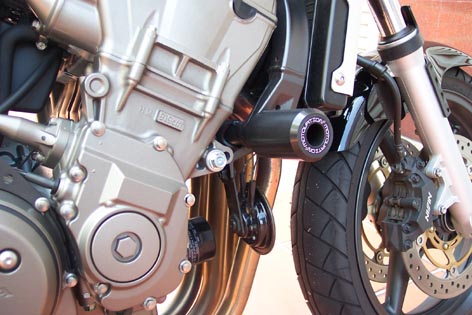
Remove the correct engine bolts(see pic).
Using a 10mm drill bit carefullly ream the hole to 10mm. Repeat with the other side.
Clamp the threaded rod and thread one of the locknuts.
Insert a washer and the longer slider onto the 460mm threaded rod and insert it through the engine mount, from the left side of the bike.
Insert right slider (shorter), washer and locknut onto the rod and tighten. You may need to have a friend hold the nut on the other end while you do this.
Do Not Over Tighten! Some loctite or Permatex blue is recommended