

Not sure how many of you have seen this screen from Rizoma. I just installed ours and it only took 10 minutes. What an improvement it was for the front end both aesthetically and for added wind blast protection. Happy to report that this is the first of many Rizoma parts we will be installing on this custom FZ09 project!
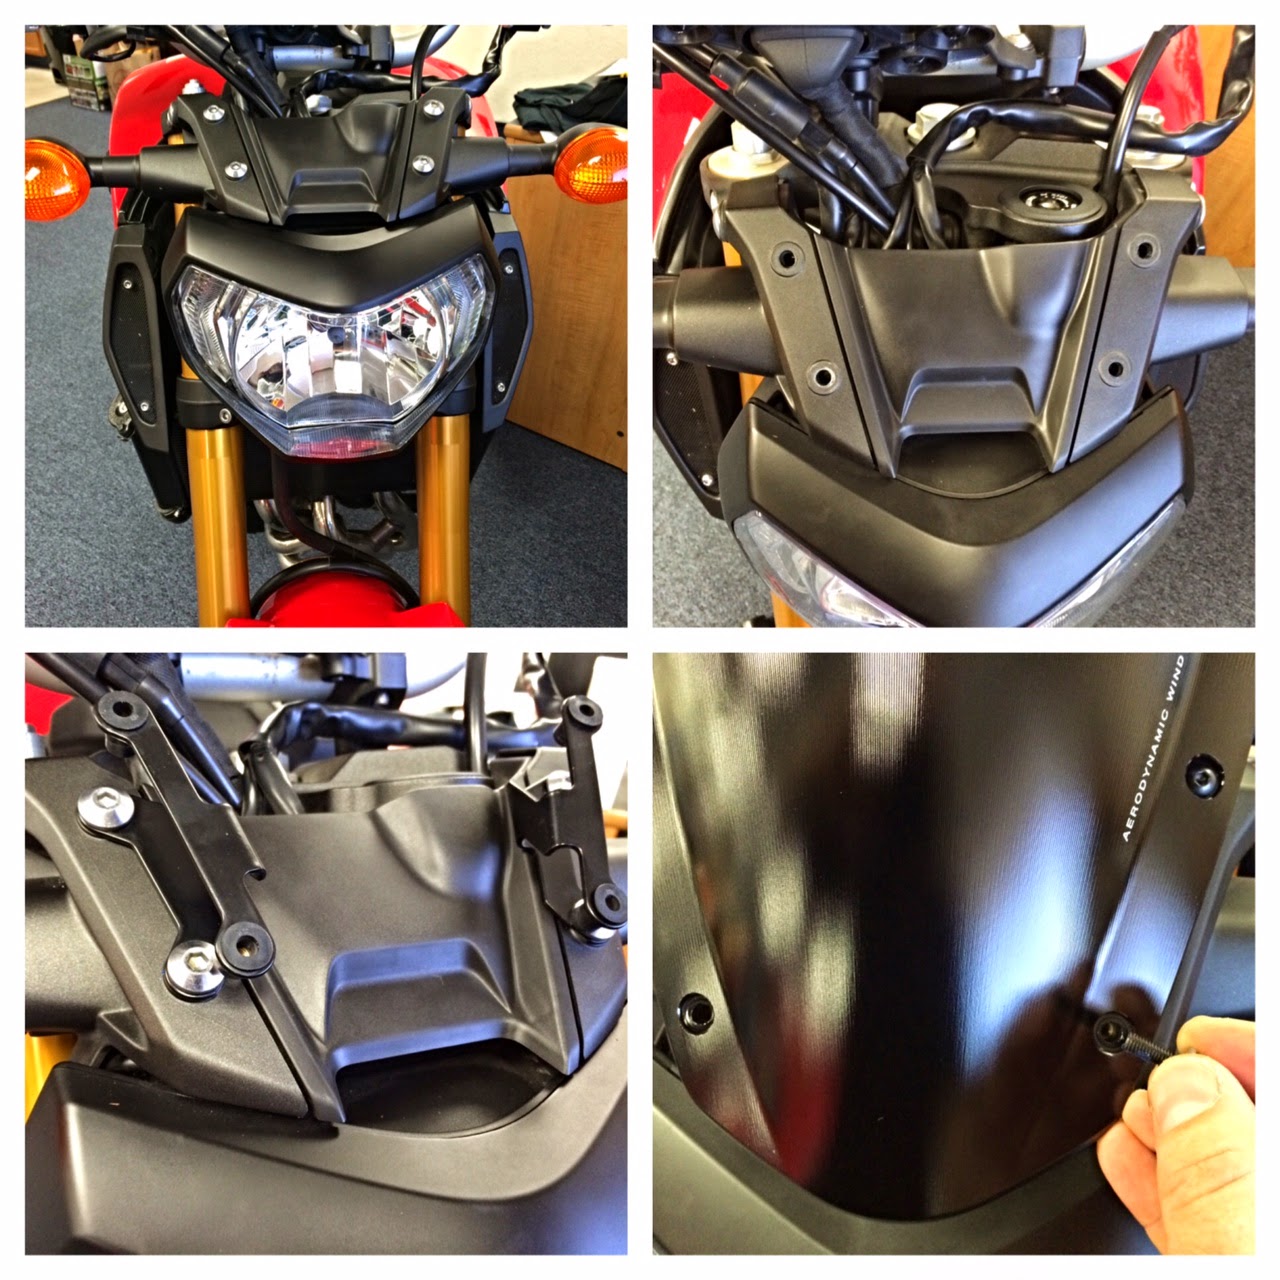
1. Remove the front 4 OEM bolts on the front "plate" that the turn signals are mounted to. (set them aside, you will reuse them.)
2. install the supplied FZ-09 bracket using the bolts you just removed - with a dab of blue loctite. (pay attention to make sure you dont install them backwards, otherwise the screen wont line up) ***Note: your kit will also include brackets for the FZ-07, you will NOT be using those***
3. Once the left and right bracket are installed, press in the 4 rubber windscreen bolt receivers into the 4 open holes of the brackets. Slightly wetting them may help them slid into place.
4. Line up the screen and install it using the 4 supplied black bolts and their plastic washers - again, blue loctite is recommended. ***Do not over tighten these, you will see the rubber bolt receivers start to "mushroom out" in order to hold the screen in place.
5. Step back and say "damn that screen looks good!"
FYI, these instructions will be the same if you decide to go with the polycarbonate or the aluminum screen. After installing this piece, I had to wonder why Yamaha left that front plate with nothing installed on it. It just looks so much better with the headlight fairing installed IMO.
Rizoma Part #