
Ducati FSD14R Frame Slider Installation Instructions
***PLEASE NOTE: Motovation must insist that all protection parts and accessories are professionally installed to ensure proper fitment and maximum protection. These instructions are for reference only, and do not reference a specific bike model. Your installation procedure may vary.***
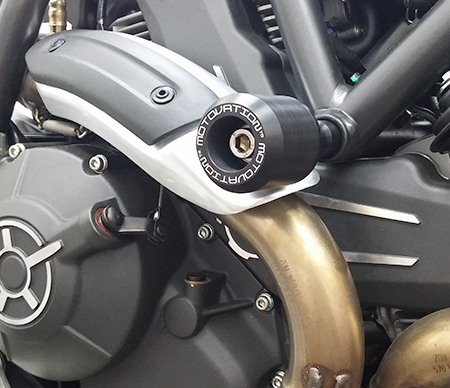
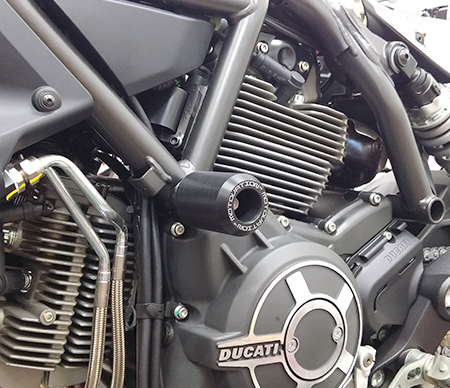
Motovation Frame Sliders
These sliders have been designed to offer unsurpassed protection to your engine and frame in the unfortunate event of a lowside or tip over. Riders around the world have tested our products on the street and track with outstanding results.
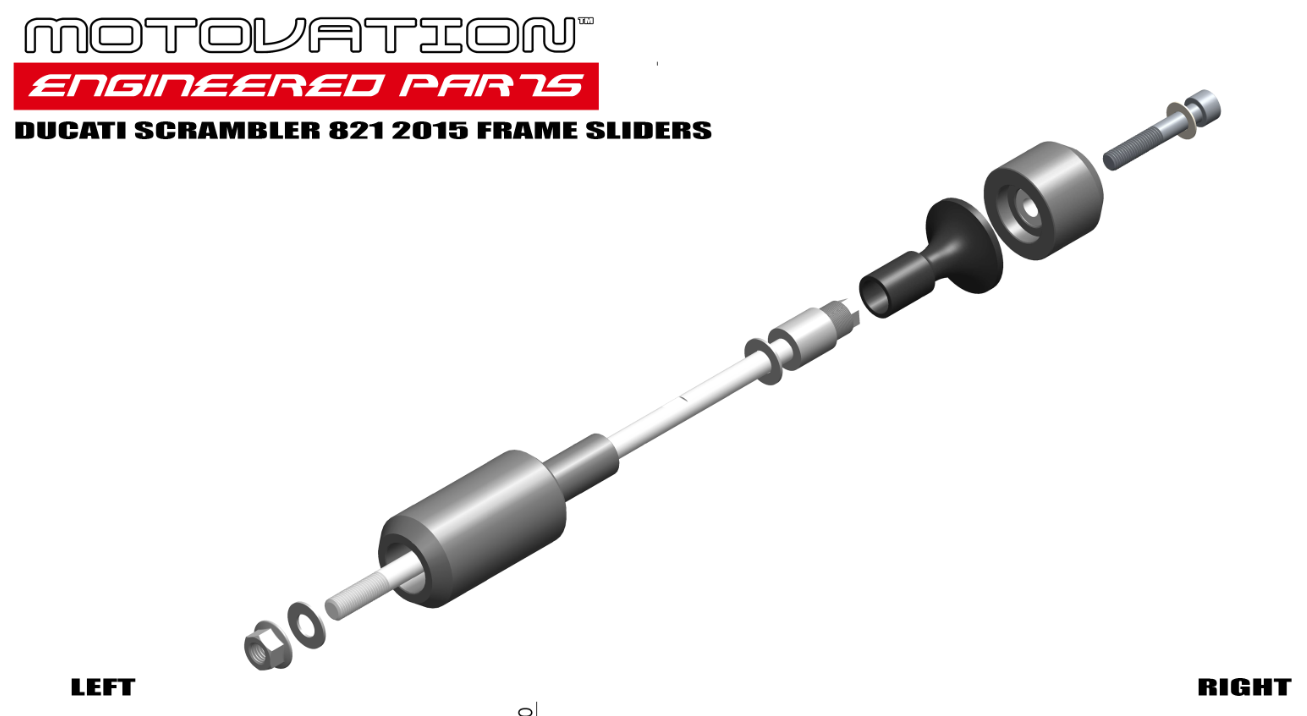
This Motovation frame slider kit will include: (some models may vary slightly)
(2) Engine Slider Pucks
(1) Steel through engine rod with special adapter
(1) Stainless Steel socket head bolt and washer
(1) Aluminum Puck Spacer
(1) Flange Nut and Washer
Instructions:
1) Make sure the bike is on a stand and vertical, and make sure that the engine is supported from below by blocks.
2) Remove the rubber bungs that cover the left and right frame mounting points as seen in the above picture. (if installed)
3) Loosen and remove the mid engine support rod's nut on the right side (right while sitting on bike). You may have to secure the left side with an allen key to do this.
4) From the right side, install the slider into the frame and insert the rod through the slider till it meets the factory engine bolt. Using a rubber mallet, very gently drive the factory bolt out. You are essentially using the new frame slider engine rod, to drive out the stock engine rod. This should help ensure the motor is never unsupported during the install. It should come out pretty easily. Do not use excessive force as this may damage the threads on the supplied rod. Although unlikely, if it does not come out easily you may have to lower or raise the engine supporting blocks a bit.
5) Once the factory bolt is driven out and the supplied threaded rod is protruding out from the left side (the end with the shorter length of threads), install the left slider using the supplied gripnut and flat washer. It may be necessary to loosen or tighten the nuts to ensure that sufficient amount of threads are exposed on each side. Tighten the nuts to factory torque specifications.
Below is a customer install video that may provide additional reference. Please note, this is a customer supplied video and not an official Motovation install video.
Please double check your install and feel free to CONTACT US with any questions. Motovation is not responsible for any damage during installation and recommends professional installation for all parts and accessories.
Motorcycles can be dangerous. Motovation has no control over the usage of any part and expects their customers to exercise good judgment as to the proper selection, installation, use and maintenance of any part. Motovation assumes no responsibility for damage or injury of any kind because of the misuse or improper installation or application of any part in any way by any person. MotovationUSA shall not be liable for any indirect or consequential damages whatsoever.