
Aprilia FSA07S Frame Slider Installation Instructions
***PLEASE NOTE: Motovation must insist that all protection parts and accessories are professionally installed to ensure proper fitment and maximum protection. These instructions are for reference only, and do not reference a specific bike model. Your installation procedure may vary.***
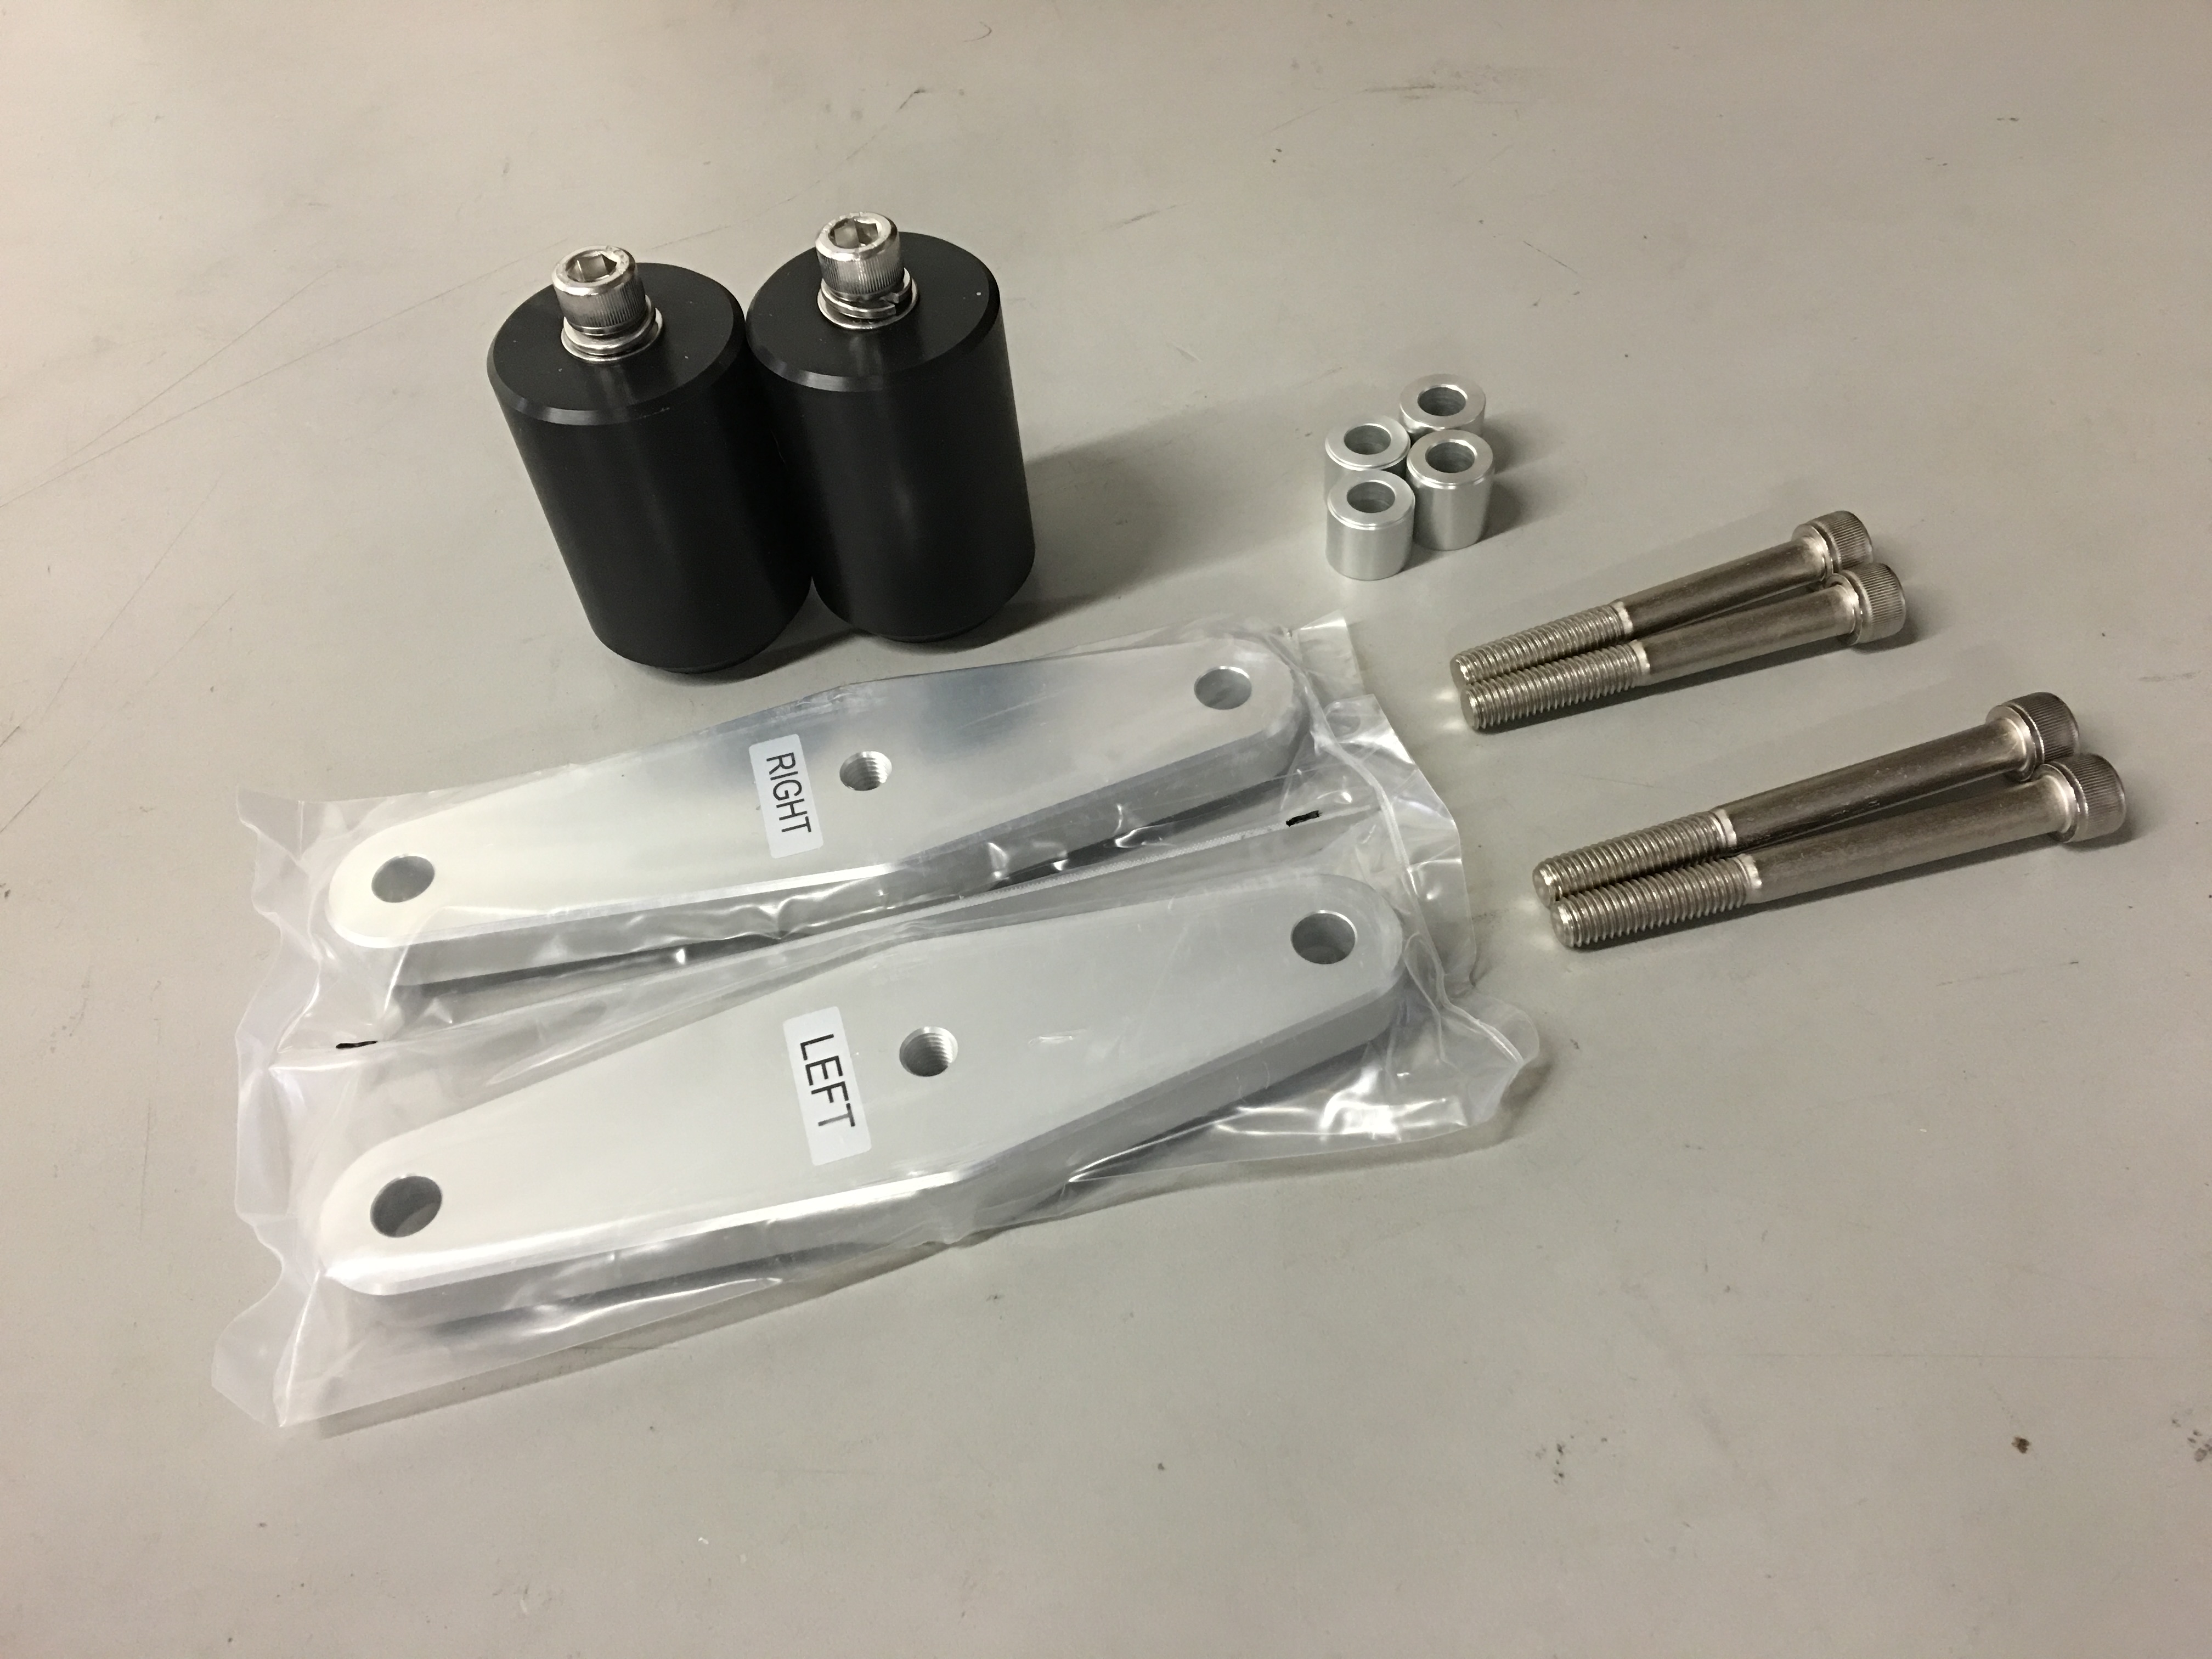
Motovation Frame Sliders
These sliders have been designed to offer unsurpassed protection to your engine and frame in the unfortunate event of a lowside or tip over. Riders around the world have tested our products on the street and track with outstanding results.
Note: Motovation recommends the use of medium strength (Blue) Loctite on all bolts.
This Motovation frame slider kit will include: (some models may vary slightly)
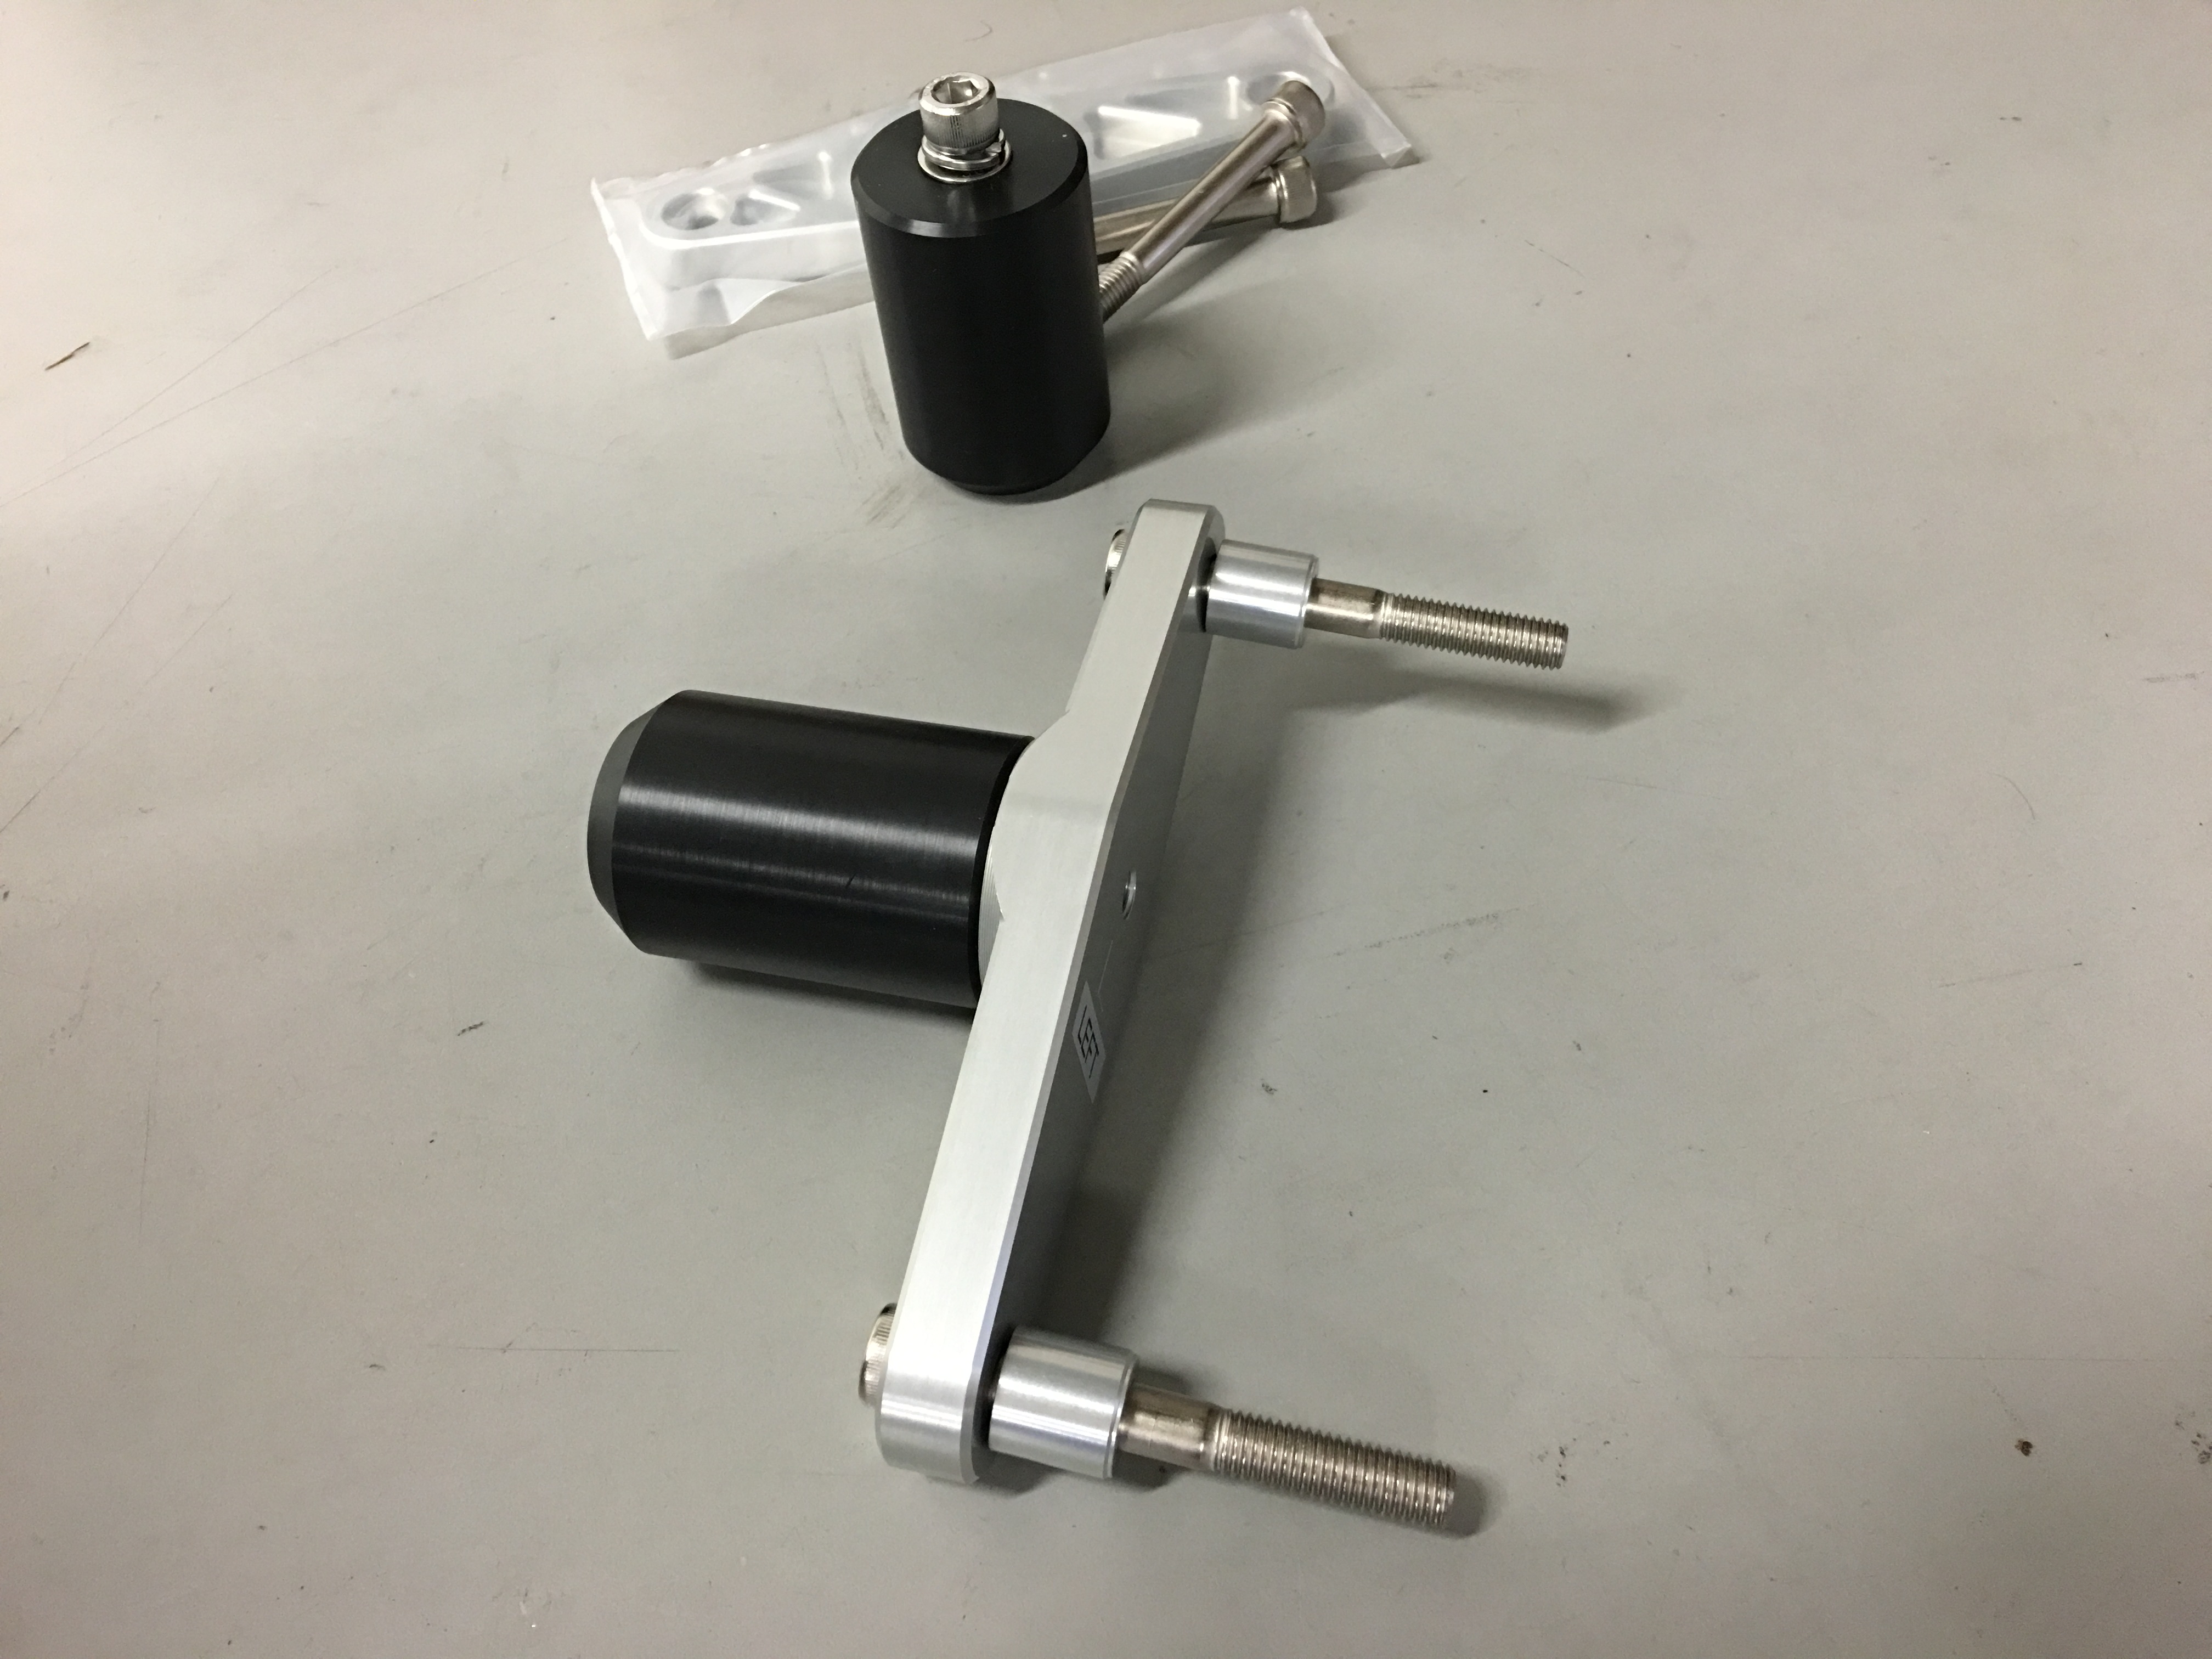
(2) Engine Slider Pucks with aluminum inserts, flat washers, lock washers and bolts - to mount to brackets
(2) Frame Mount Brackets (labeled Left and Right)
(4) Stainless Steel socket head bolts - (2) 80mm (2) 95mm - for bracket to frame mounting
(6) Aluminum Bracket Spacers - (2) 16mm (4) 20mm (*only 4 total will be used - see spacer description below)
***SPECIAL NOTE REGARDING SPACERS*** - Due to the adjustable engine mount option on some bike models, the following spacer combinations will be used:
(4) 20mm spacers : (2 per bracket)
- Aprilia RSV4 Factory (2009-2015)
- Aprilia RSV4 RR
- Aprilia RSV4 RF
(2) 20mm spacers and (2) 16mm spacers : (1) 20mm and (1) 16mm per bracket)
- Aprilia RSV4 / RSV4R and APRC models (2009-2015)
- Aprilia Tuono V4R (All Years)
Instructions:
1) Make sure the bike is on a stand and vertical, and for safety make sure that the engine is cool and is supported from below by blocks.
RIGHT SIDE (In relation to sitting on the bike)
1) Remove the rear side fairing bolt for access to the frame.
2) Remove the 2 factory bolts shown. NOTE: Be careful not to drop the OEM bushings behind the frame.

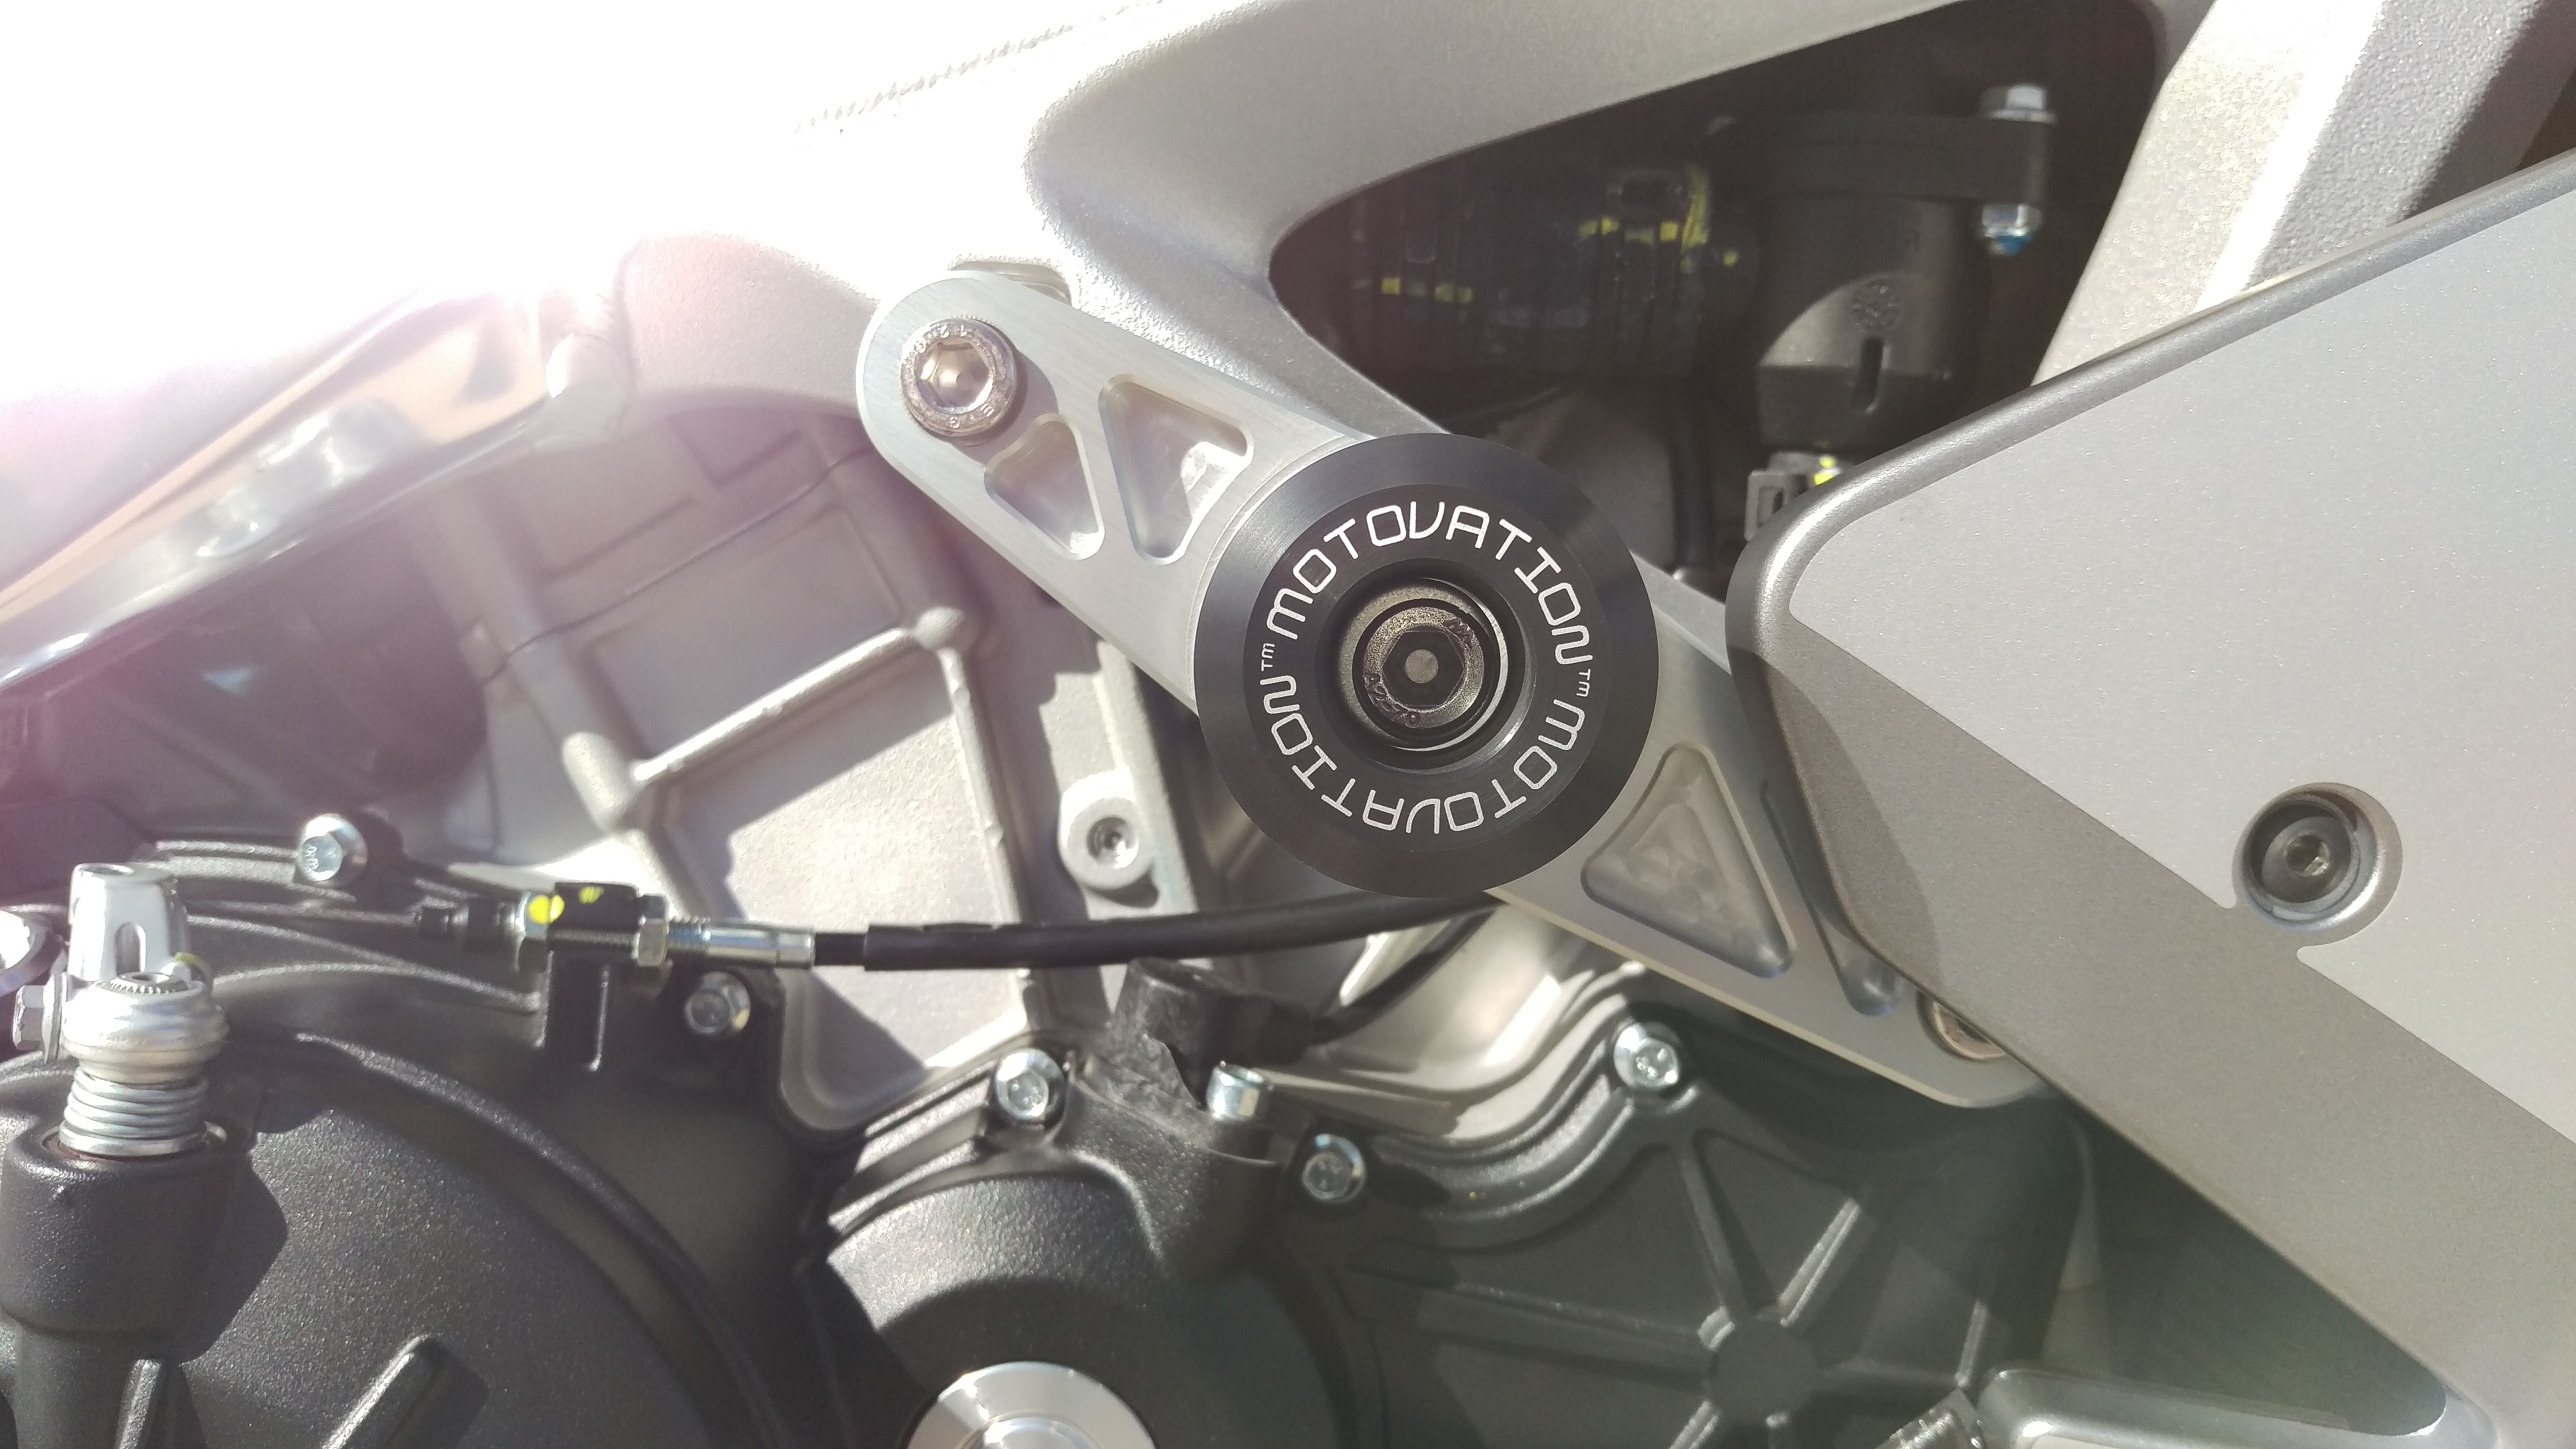
3) Install the brackets marked RIGHT (R) into the frame holes using 2 of the supplied bushings between the bracket and the frame. You will use the (2) 95mm hardened bolts supplied. The shorter end of the bracket should face towards the rear of the bike, allowing the slider puck (when installed) to stick out just beyond the fairing. Note: See the spacer description to determine which size spacers you will use. (Either use both 20mm spacers or (1) 16mm and (1) 20mm spacer. If using the smaller 16mm spacer, that 16mm spacer will go on the lower/front bracket bolt in order to straighten the bracket when running your motor in the adjusted position)
4) Tighten the 2 bolts holding the bracket into the frame using the same factory torque specs recommended in your service manual for the OEM bolts you are replacing.
5) Install the frame slider puck into the bracket using the included bolt, flat washer, and lock washer. 35 ft/lbs of torque is recommended for the bolt that goes into the Motovation bracket.
6) Reinstall fairing bolt.
DO NOT OVERTIGHTEN.
LEFT SIDE (In relation to sitting on the bike)
1) Remove the rear side fairing bolt for access to the frame.
2) Remove the 2 factory bolts shown. NOTE: Be careful not to drop the OEM bushings behind the frame.

3) Install the brackets marked LEFT (L) into the frame holes using 2 of the supplied bushings between the bracket and the frame. You will use the (2) 80mm hardened bolts supplied. The shorter end of the bracket should face towards the rear of the bike, allowing the slider puck (when installed) to stick out just beyond the fairing. Note: See the spacer description to determine which size spacers you will use. (Either use both 20mm spacers or (1) 16mm and (1) 20mm spacer. If using the smaller 16mm spacer, that spacer will go on the lower/front bracket bolt in order to straighten the bracket when running your motor in the adjusted position)
4) Tighten the 2 bolts holding the bracket into the frame using the same factory torque specs recommended in your service manual for the OEM bolts you are replacing.
5) Install the frame slider puck into the bracket using the included bolt, flat washer, and lock washer. 35 ft/lbs of torque is recommended for the bolt that goes into the Motovation bracket.
6) Reinstall fairing bolt.
DO NOT OVERTIGHTEN.
Note: We recommend that you check the torque on the slider bolts after several heat cycles to ensure secure tightness.
Additional Reference Images:

Please double check your install and feel free to CONTACT US with any questions. Motovation is not responsible for any damage during installation and recommends professional installation for all parts and accessories.
Motorcycles can be dangerous. Motovation has no control over the usage of any part and expects their customers to exercise good judgment as to the proper selection, installation, use and maintenance of any part. Motovation assumes no responsibility for damage or injury of any kind because of the misuse or improper installation or application of any part in any way by any person. MotovationUSA shall not be liable for any indirect or consequential damages whatsoever.